Aruba Controller
The following guide was created using an Aruba wireless network with the following components:
- AP: model APIN0205
- Controller: model 7005
- Software: ArubaOS 6.5.4.1
Contents |
Walled Garden
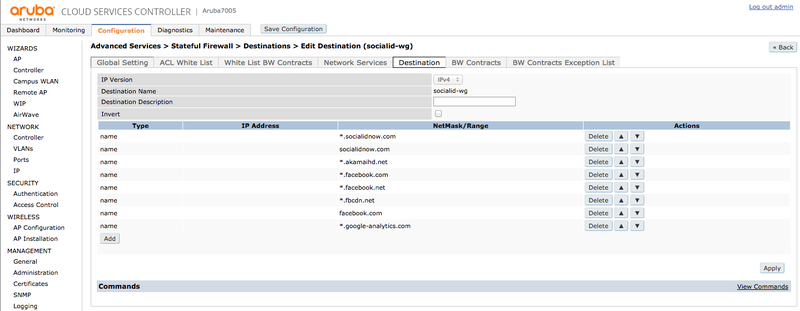
Go to "ADVANCED SERVICES > Stateful Firewall > Destination" and create a group "socialid-wg".
Add an entry with type "name" for each walled garden domain you want to enable on your captive portal:
RADIUS Servers
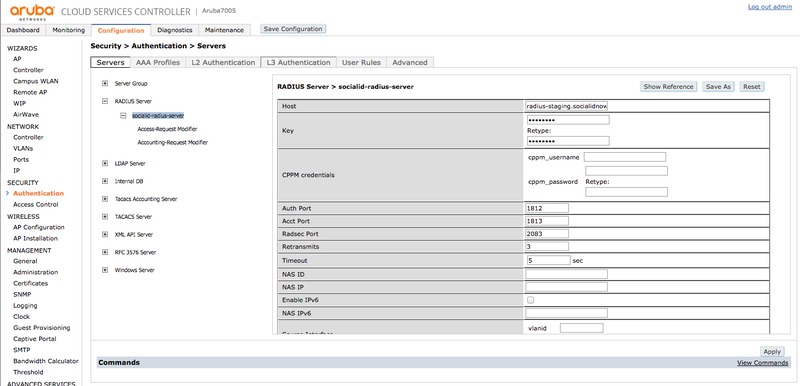
Go to "SECURITY > Authentication > Servers", select the group "RADIUS server" and create a new entry labeled "socialid-radius-primary-server" with the following parameters:
- Host: the RADIUS server host or IP according to your environment/region
- Key: the provided shared secret
- Auth Port: 1812
- Acct Port: 1813
Repeat the process and create a server "socialid-radius-secondary-server" for the secondary RADIUS server host.
Server Group
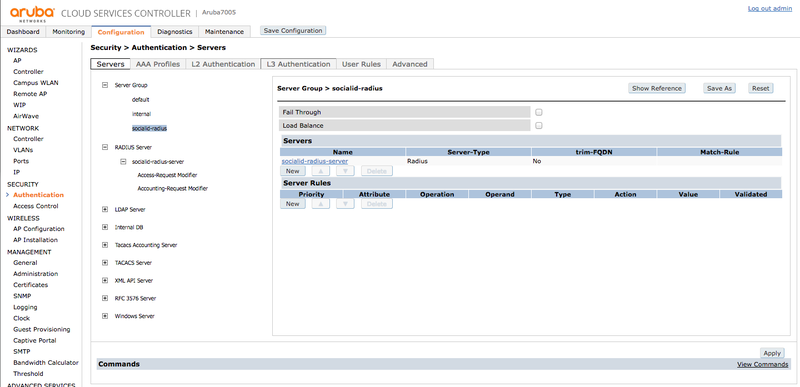
Go to "SECURITY > Authentication > Servers", click in "Server Group" and create a new group labeled "socialid-radius". Add the RADIUS servers "socialid-radius-primary-server" and "socialid-radius-secondary-server":
Authenticated User Role
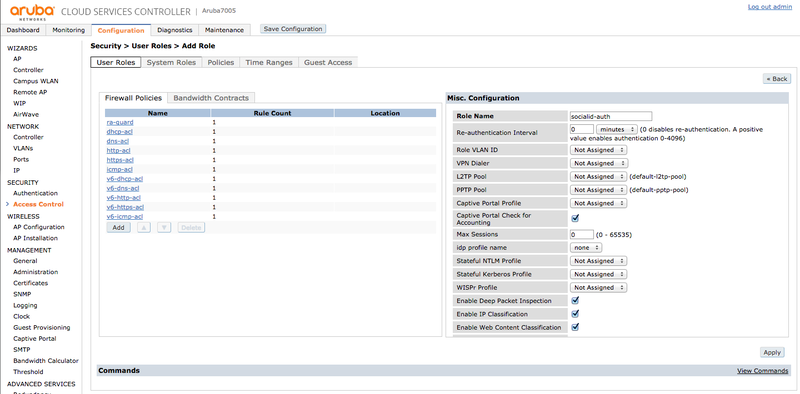
Go to "SECURITY > Access Control > User Roles" and create an "User Role" labeled "socialid-auth" with the default parameters and add the following "Firewall Policies" rules:
- ra-guard
- dhcp-acl
- dns-acl
- http-acl
- https-acl
- icmp-acl
- v6-dhcp-acl
- v6-dns-acl
- v6-http-acl
- v6-https-acl
- V6-icmp-acl
Captive Portal
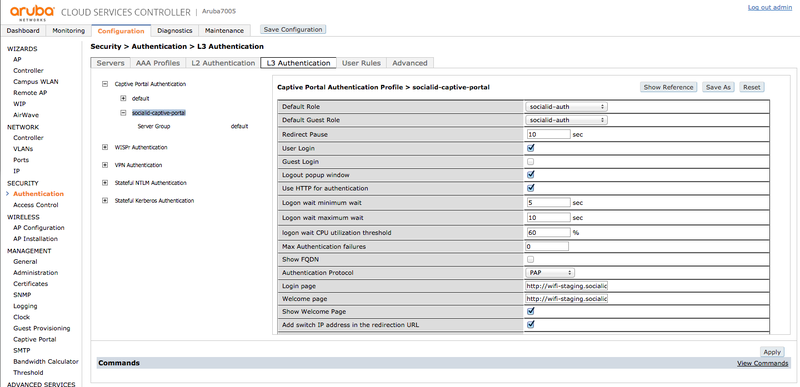
Go to "SECURITY > Authentication > L3 Authentication", click in "Captive Portal Authentication" and create a new entry labeled "socialid-captive-portal" with the following parameters:
- Default Role: socialid-auth
- Default Guest Role: socialid-auth
- Redirect Pause: 10 sec
- User Login: checked
- Use HTTP for authentication: checked
- Login page: the provided captive portal login URL (e.g.: http://wifi-staging.socialidnow.com/portals/cbt-aruba-lab/auth)
- Welcome page: the provided captive portal welcome URL (e.g.: http://wifi-staging.socialidnow.com/portals/cbt-aruba-lab)
- Show welcome page: checked
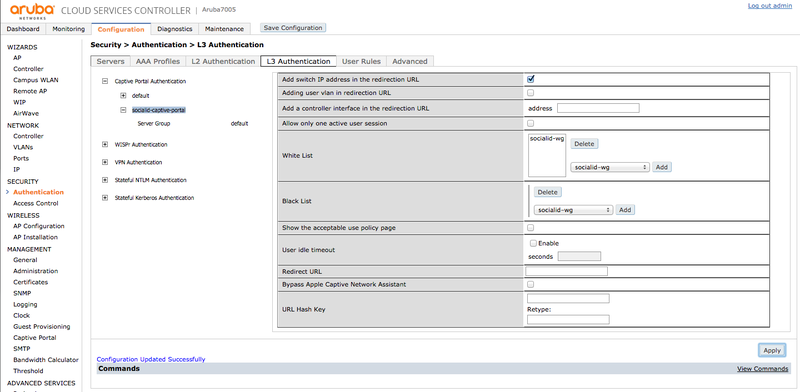
- Add switch IP address in the redirection URL: checked
- White List: adicionar socialid-wg
Server Group
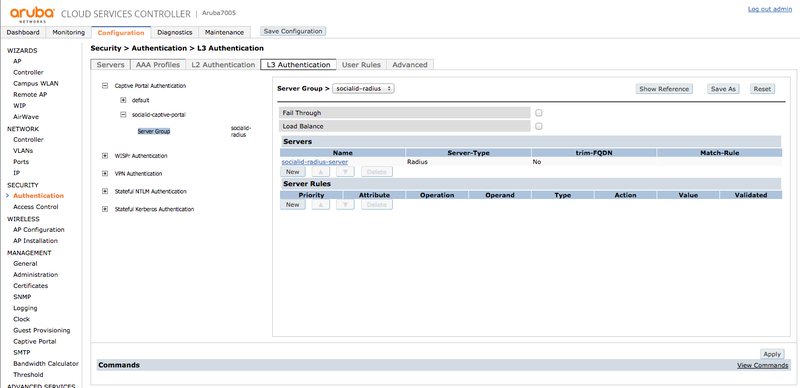
In the Captive Portal "Server Group", select the "socialid-radius" group as the "Server Group":
Pre-Auth User Role
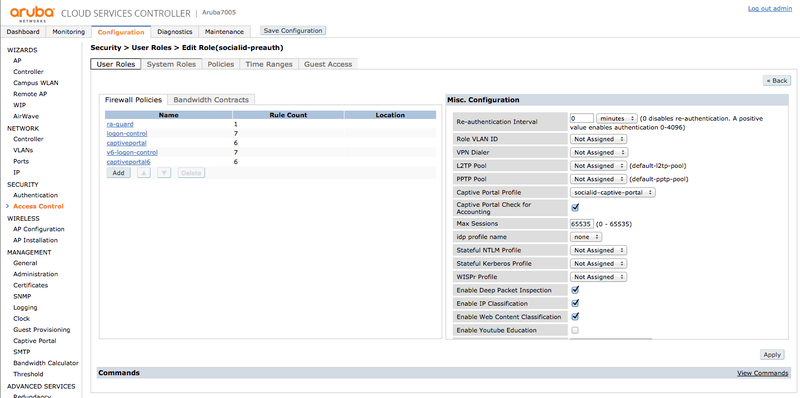
Go to "SECURITY > Access Control > User Roles" and create an "User Role" labeled "socialid-preauth" with the following parameters:
- Captive Portal Profile: socialid-captive-portal
And add the following "Firewall Policies" rules:
- ra-guard
- logon-control
- captiveportal
- v6-logon-control
- captiveportal6
AAA Profile
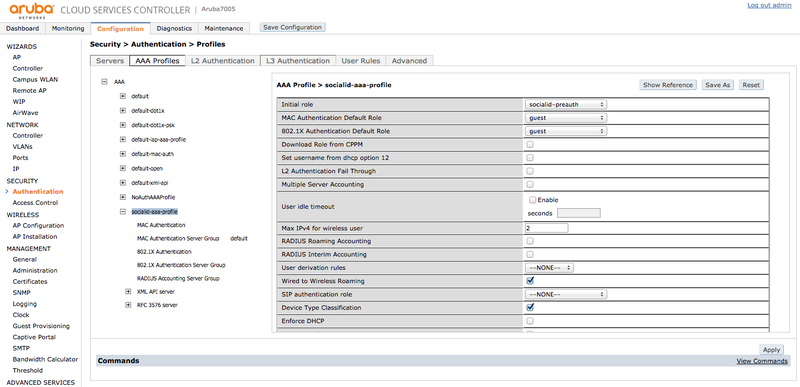
Go to "SECURITY > Authentication > AAA Profile" and create a new profile labeled "socialid-aaa-profile" with the following parameters:
- Initial Role: socialid-preauth
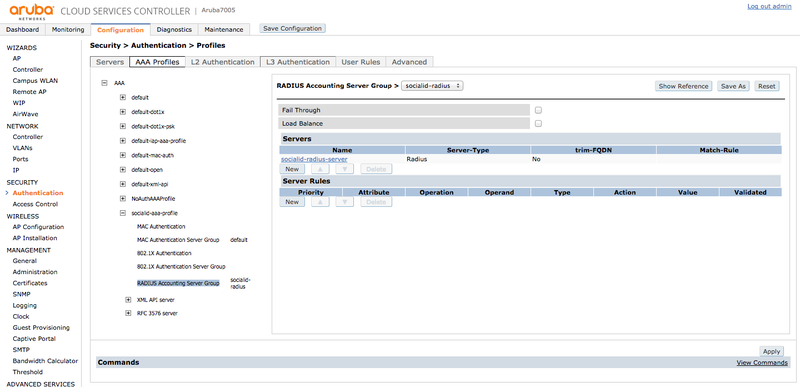
RADIUS Accounting Server Group
In the "RADIUS Accounting Server Group" subitem, select the "socialid-radius" group as the "RADIUS Accounting Server Group":
AP Configuration
Go to "Wireless > AP Configuration", and create a new "AP Group" labeled "socialid-ap-group".
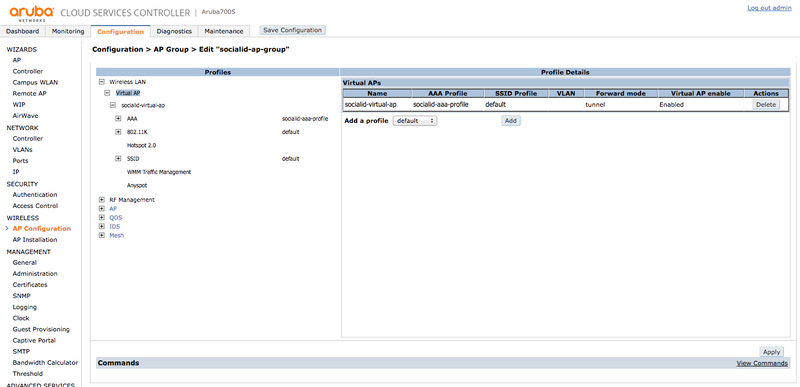
Virtual AP
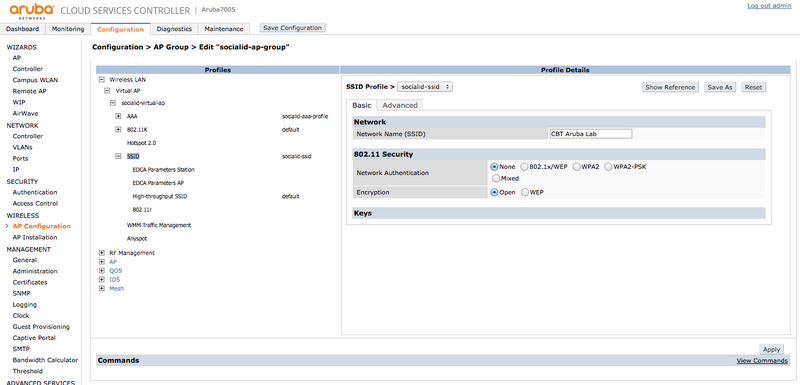
In the AP Group, go to "Wireless LAN > Virtual AP" and create a new "Virtual AP" labeled "socialid-virtual-ap":
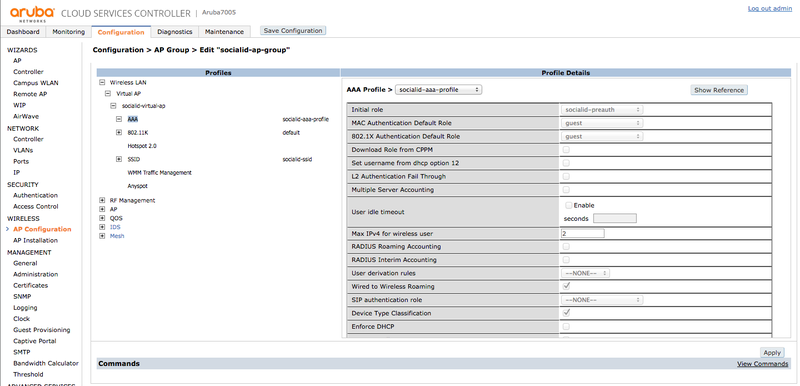
AAA Profile
In the Virtual AP, go to "AAA" and select the "socialid-aaa-profile" as the "AAA Profile":
SSID Profile
In the Virtual AP, go to "SSID" and create a new SSID Profile labeled "socialid-ssid". Set your Network Name (SSID):
