Ruckus Virtual SmartZone
The following guide was created using a Ruckus wireless network with the following components:
- Controller: Ruckus Virtual SmartZone
- Controller System Version: 3.2.1.0.163
- AP: Ruckus ZoneFlex R310
- AP Firmware: 3.2.0.0.593
Contents |
Configuring the RADIUS server
Configure the Social-ID RADIUS server by creating a new AAA Server.
Go to "Configuration > Wireless Network > AAA Servers > Proxy AAA".
RADIUS Authentication
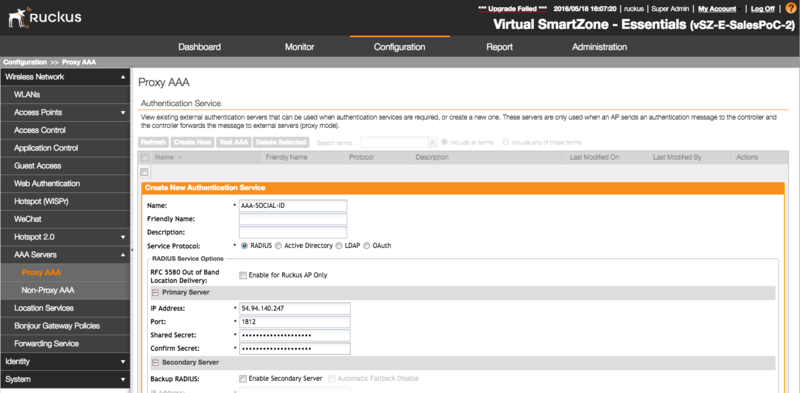
For "Authenticaton Service", click in the "Create New" link and fill the name, such as "AAA-SOCIAL-ID":
Then fill the following info:
- Service Protocol: RADIUS
- IP Address: 54.94.140.247
- Port: 1812
- Shared Secret: the provided RADIUS client secret
- Confirm Secret: the provided RADIUS client secret
RADIUS Accounting
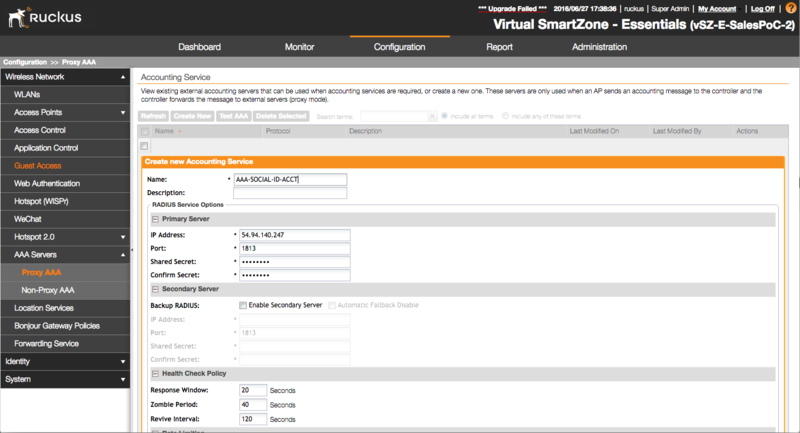
For "Accounting Service", click in the "Create New" link and fill the name, such as "AAA-SOCIAL-ID-ACCT":
Then fill the following info:
- IP Address: 54.94.140.247
- Port: 1813
- Shared Secret: the provided RADIUS client secret
- Confirm Secret: the provided RADIUS client secret
Configuring the Hotspot (WISPr)
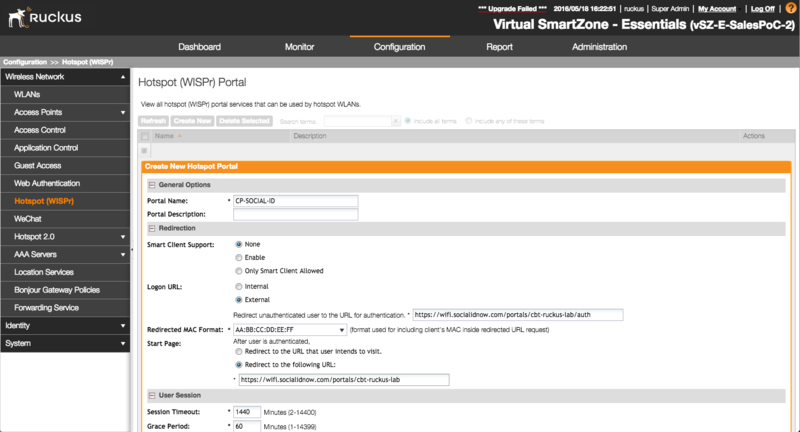
Go to "Configuration > Wireless Network > Hotspot (WISPr)", click in the "Create New" link and fill the Portal Name, such as "CP-SOCIAL-ID":
Then fill the following info on "Redirection" section:
- Logon URL: select "External" and fill the "Redirect unauthenticated user to the URL for authentication" with the provided captive portal login URL
- Start Page: select "Redirect to the following URL:" and fill the provided captive portal start URL
You can also adjust the "Session Timeout" and "Grace Period" according to your specifications.
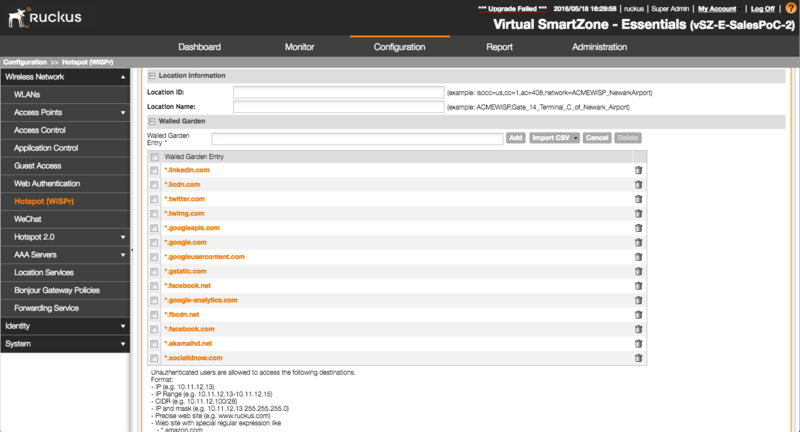
Walled Garden
Allow Social-ID NOW platform URLs and social network URLs by configuring the Hotspot Walled Garden destinations.
Add the entries according to Walled Garden for the Social Login URLs:
Configuring the WLAN
Now you need to create a Wireless LAN with the Hotspot (WISPr) previously created.
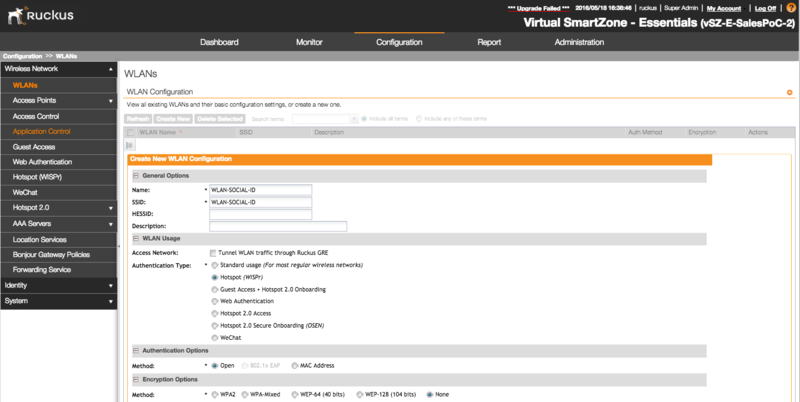
Go to "Configuration > Wireless Network > WLANs", click in the "Create New" WLAN Configuration and fill the Name and SSID, such as "WLAN-SOCIAL-ID":
Then fill the following info:
- WLAN Usage > Authentication Type: Hotspot (WISPr)
- Authentication Options > Method: Open
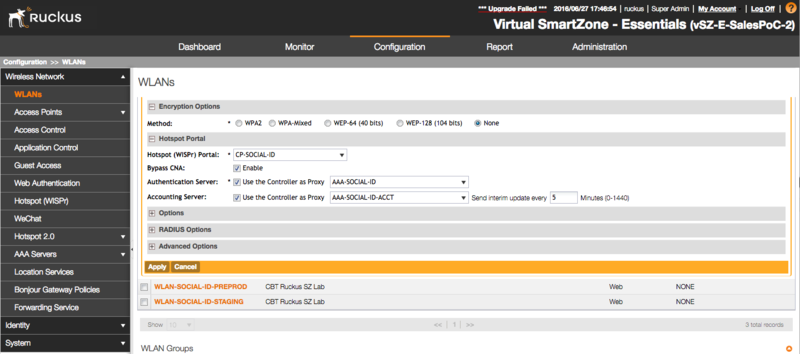
- Encryption Options > Method: None
- Hotspot Portal > Hotspot (WISPr) Portal: the previously Hotspot (WISPr) created (e.g.: "CP-SOCIAL-ID")
- Hotspot Portal > Authentication Server: check the "Use the Controller as Proxy" and select the previously RADIUS Authentication Server created (e.g.: "AAA-SOCIAL-ID")
- Hotspot Portal > Accounting Server: check the "Use the Controller as Proxy" and select the previously RADIUS Accounting Server created (e.g.: "AAA-SOCIAL-ID-ACCT")
WLAN Group
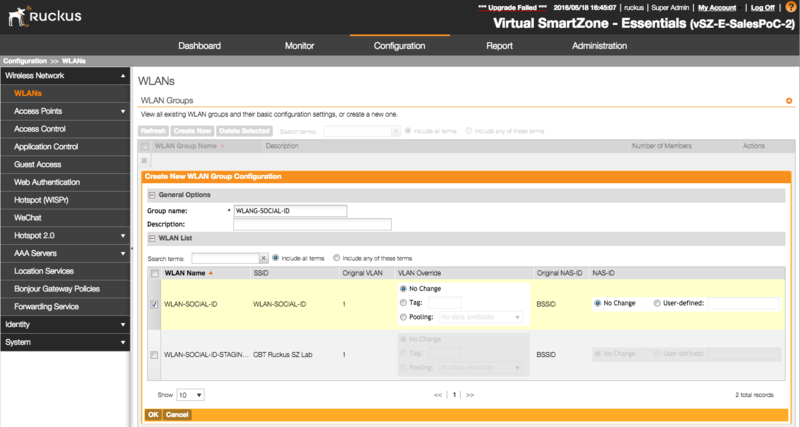
You need to associate the previously WLAN with a WLAN Group.
Probably you already have a "Default" one, but you can also create a new one and associate the previously WLAN as a "Member":
Configuring the Access Points
You need to associate the WLAN Group previously created/configured to your Access Points.
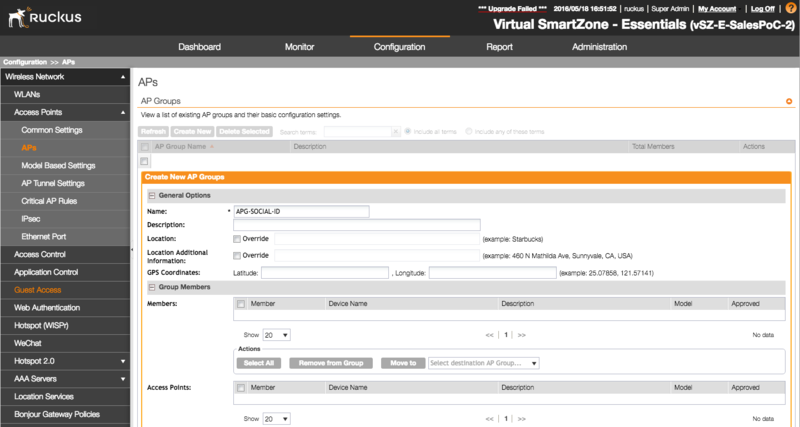
Go to "Configuration > Wireless Network > APs" and check "AP Groups" section.
Click in the "Create New" AP Group and fill the Name, such as "APG-SOCIAL-ID":
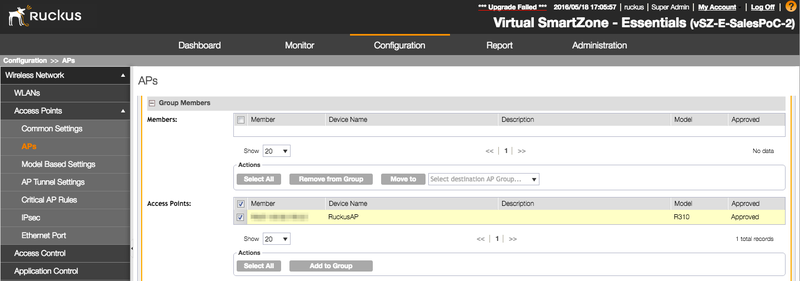
Add the Access Points to the group:
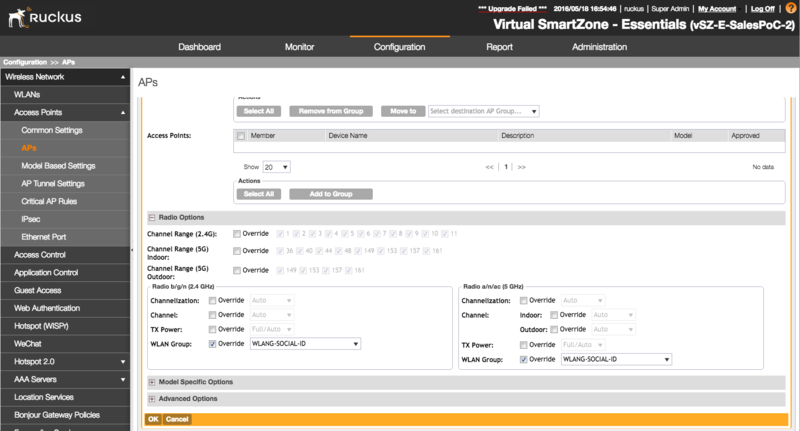
Then assign the previously WLAN Group by overriding the configuration:
If you prefer, you can also override the WLAN Group for each AP individually.
