Social Login User Guide
Contents |
Introduction
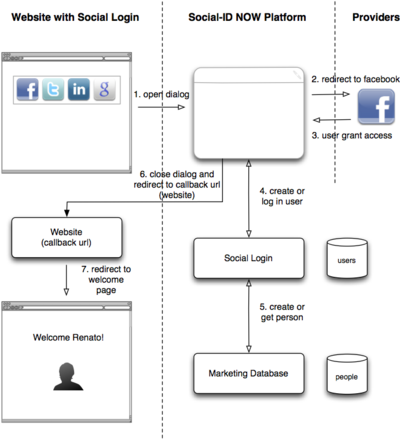
Social Login allow users to log in websites or application using their Facebook, Twitter, Linkedin, or Google+ accounts. This increases engagement and conversion rates by offering a simple registration mechanism where the user can start interacting with the website with just 1 click instead of forcing him or her to fill multiple fields on a registration form. Most people already use their social network accounts on a daily basis and would rather log in using these accounts than using a traditional email / password login.
Social Login implementation is divided into 3 steps:
- Configure a Social Login instance
- Install the widget on the Website
- Implement the callback on the Website
Social Login Configuration
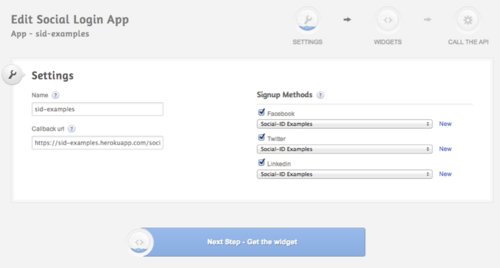
The picture above shows the Social Login configuration screen. On this screen you have to fill:
- Name: a name for the Social Login instance (used as an internal reference only).
- Callback url: the url that will receive a post request with the user identification token after a successful login attempt.
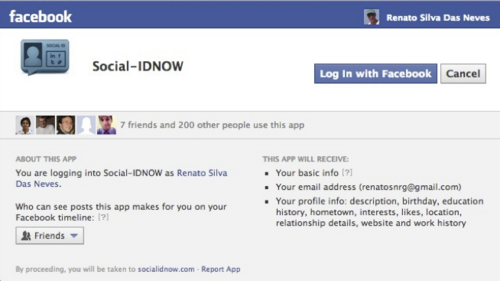
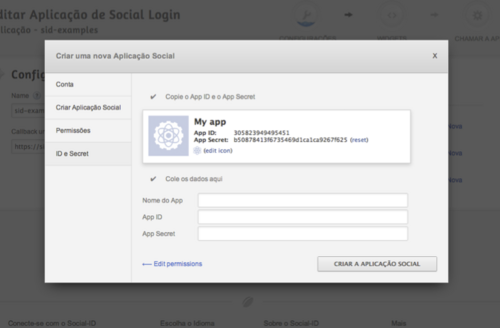
- Registration methods: the social networks that can be used to perform the Social Login. It is possible to change the social applications used here; these social applications can be configured on the social networks themselves to take in consideration branding, like name and logo:
The creation of social applications is done following a configuration wizard:
Widget Installation
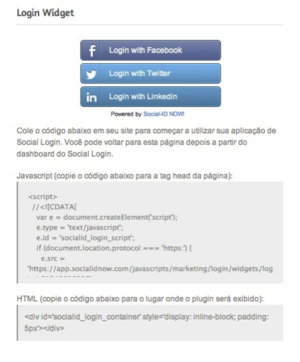
This installation is done by pasting a JavaScript code snippet that loads the Social Login widget in place. The screen that allows to configure the widget theme and that shows the JavaScript code snippet is shown in the following picture:
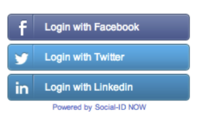
When entering a page configured with the JavaScript code, the following widget should be seen (if configured with the "bricks" theme):
Or if you use the "icons" theme:
Callback Implementation
This step is used to integrate social login with the user management system already in place on the website. We have APIs that allow this integration in a very simple way. The basic idea is to associate the user's "id" on social login and the user's "id" on your website. Two things can happen:
1. On the callback, the user's "id" is not related with any website user: in this case, a new user should be created (on the website) and associated with the social login user. If a user already exists (say, if the user created a traditional account), the user's account should be associated with the social login account.
2. On the callback, the user's "id" is already associated with a website user: in this case, the user should be logged in.
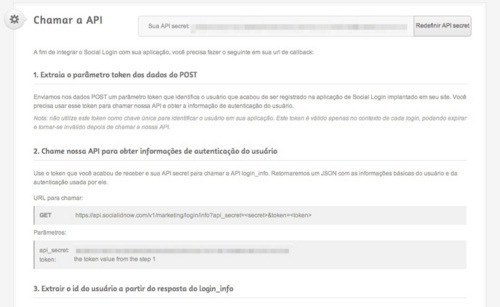
To get the user's "id" from Social Login, follow the steps explained on the "Call the API" screen:
Step 1: Extract the "token" parameter from POST data
We send via POST a parameter called "token" that identifies the user that just registered / logged in on the Social Login used on your website. Use this token to call the API and get the user's authentication information.
Step 2: Call our API to get the user's authentication information
Use the token you just got and your API secret to call the login/info API. You'll get back a JSON data structure with basic information about the user and the authentication method used by him/her.
URL to call:
GET https://api.socialidnow.com/v1/marketing/login/info?api_secret=<secret>&token=<token>
Parameters:
- api_secret: the "secret" you can get on the "Call the API" screen
- token: the token returned on step 1
Step 3: Extract the user's "id" from the login/info response
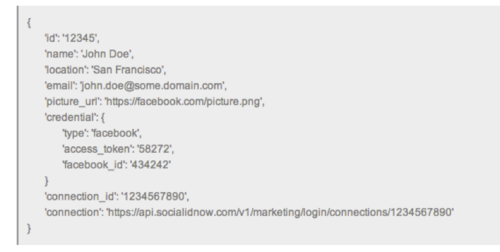
When you call the login/info API you'll get a response like this:
You can use the "id" field as a unique key to identify the user on your website. This is this user's "id" on Social Login.
Social Login user session
The login/info API returns another very important value: “connection_id”. We keep a session identification for every logged in user on Social Login to use in certain APIs and widgets (to make it easier to use these resources).
At the moment the user logs in on Social Login, we store a session cookie on his browser and track the "connection_id" so we can identify him automatically on certain widgets and APIs. Some RESTful APIs require the "connection_id" value, and so it is returned by the login/info API.
It's important to note that this "connection_id" value changes every time the user logs in, so it should only be used as a *session* identification method.
