Social Webform User Guide
Deprecation notice: this feature will be deprecated on July 19, 2018.
Contents |
Introduction
Social Webforms allow users to register themselves and to fill out some fields automatically based on data from their social network accounts (such as Facebook, Twitter, LinkedIn, and Google+). Filling a form on the web becomes much simpler and faster for the user, and the user's profile is automatically captured and stored in the marketing database.
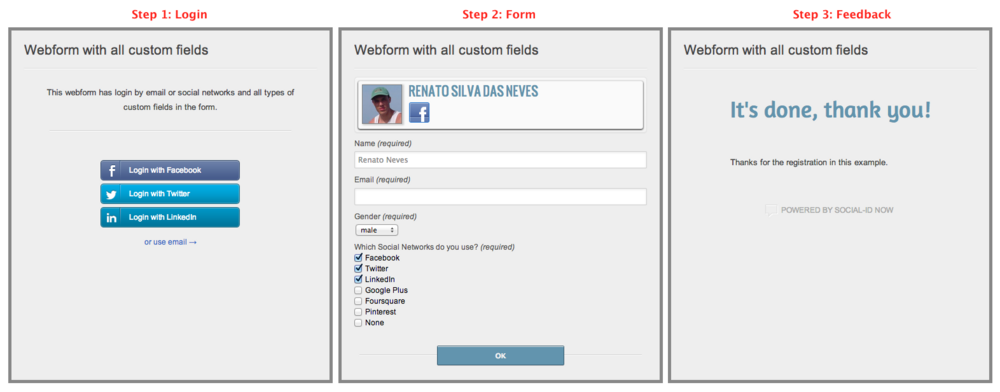
The following diagram shows the Social Webform widget steps:
- Login: visitor's identification using social login or email.
- Filling the form: configure the fields and the form will show up auto-filled with information captured by the social login mechanism. You can also configure the "like" (Facebook) and "follow" (Twitter) buttons on the form to increase engagement.
- Feedback: write a thank you message or make a redirect to another web page.
Social Webform implementation consists of 2 steps:
- Configure a Social Webform instance
- Install the widget on your Website
Social Webform Configuration
The first step consists of defining which methods of registration visitors can use (social login or email), whether the webform will accept multiple registrations or not, which social plugins will be used and which custom fields will be available to the visitor.
Registration Methods and Basic Configuration
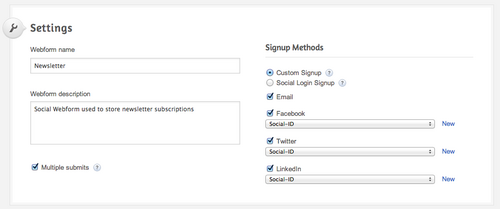
In this screen you can configure:
- Webform name: a name for this webform instance (used as an internal reference only).
- Webform description: a description for this webform instance (used as an internal reference only).
- Multiple registration: whether the webform will accept more than one registration per visitor or not; if multiple registration is not enabled, visitors will see a message saying they already registered before (in case they did).
- Registration Methods: which registration method will be used. We have two methods available:
- Custom registration: you can select which social networks the visitor can use to log in and whether the user can use email as well.
- Social Login registration: in this type of registration, the visitor identification step is performed by a Social Login application. Read this guide for more details about using a Webform associated with a Social Login.
Social Plugins
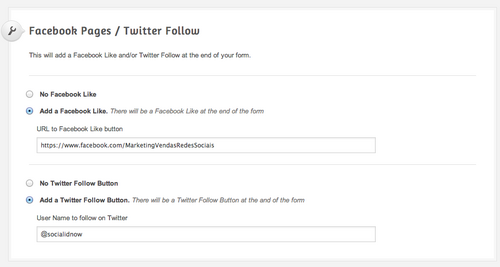
In this screen you can configure:
- URL for the Facebook "like" button: any valid URL can be used here, but the most common use is for Facebook fan page URLs.
- Username to follow on Twitter: just the screen name of the user on Twitter.
The point about using these social plugins is to increase the visitors' engagement with your brand on the social networks. The Facebook "like" and the Twitter "follow" buttons will show up with the custom fields the moment the user is filling the form, making it easy for him/her to engage and talk about your website with his/her followers and friends, making your audience grow considerably.
Custom Fields
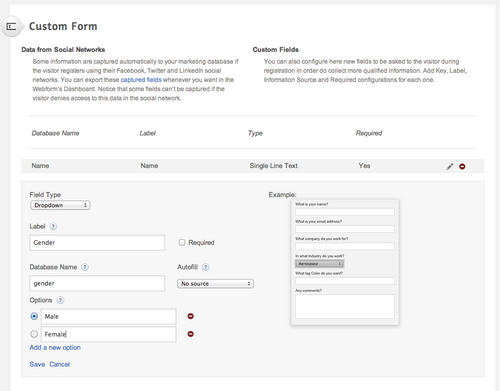
Here you can configure which fields your visitor might fill out on the webform. We support "Simple text" (text), "Paragraph" (textarea), "Dropdown" (select), and "Checkbox" (checkbox). For each of them you can configure:
- Label: the name that will show up on the widget.
- Required: whether the field is required or not.
- Database name: reference name used to feed, visualize and extract data from/to the marketing database. It is a good practice to re-use names in different webforms, e.g.: if you have two webforms that ask the user's email address, use "email" on both of them, and it will make it easier to query/create reports afterwards.
- Autofill: choose here which information captured from the social network profile should be used to auto-fill the field.
- Options: in the case of a "Dropdown" field, it is possible to configure the options that will be available for the visitor to choose, including the default option.
Callback Configuration
In this step you can configure the redirect procedure after a visitor fills the form. This configuration is optional.
You can use this configuration to redirect your visitors to hidden areas of your website, share a file or define a navigation flow for your website.
Alerts Configuration
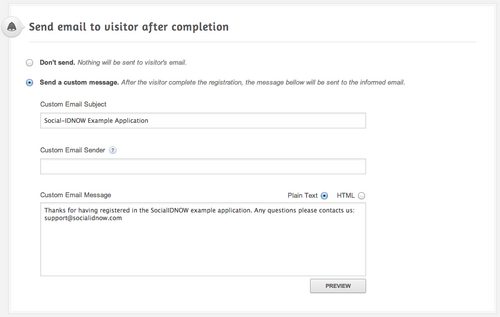
It is possible to define three different alerts, as shown below. This configuration is optional.
Email visitor after completion
This alert allows you to configure a welcome or thank you message to the visitor that just finished filling out the webform. You can configure the email subject, the address that will show up as a sender, and the message to be sent. The message may be set up as text-only or HTML.
It is important to note that this email can only be sent if the visitor registered using email or if he/she filled out a custom field with an "Email" autofill.
Notification
This alert allows you to configure emails that will receive a notification each time a visitor registers on the webform. You can use a comma-separated list of emails here.
If the webform is being used for an event or campaign, for example, this configuration can be useful to warn organizers that someone just registered.
Post a status update on the visitor's Facebook account
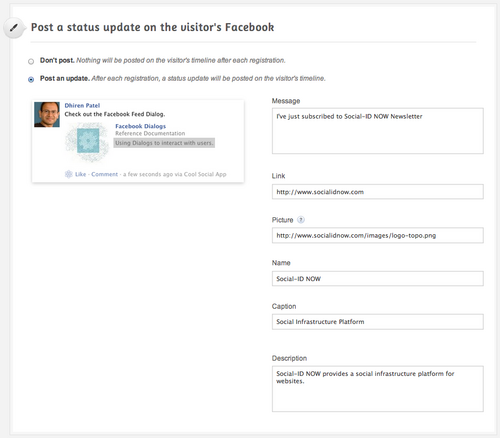
This alert allows you to configure a status update to be automatically posted onto the visitor's Facebook timeline. You can configure the message, link, image, name, caption and description that is to be posted (you can see the Facebook status update screenshot to see how each of these fields change the message to be posted).
This configuration is very useful to spread the word about a brand, event or campaign on the social networks. By posting a status update on your visitor's timeline, all his/her friends will see and may click the link, taking them to your website and increasing your audience.
It is important to note that this is only possible if:
- Facebook is one of the registration methods for this webform
- The Facebook social app used on this Webform is configured with the "publish_streams" or "publish_actions" permission.
Facebook will ask the visitor if he/she allows you to publish in his/her name and if the user authorizes it, the message will be posted on his/her timeline. If the user does not allow it, he/she can still fill out the form but nothing will be posted.
Widget Configuration
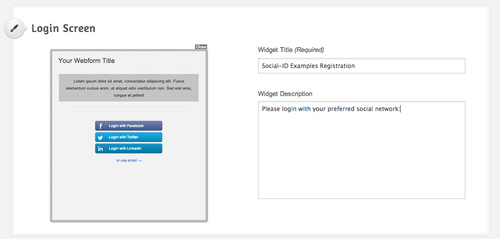
You can configure some information that is shown on the widget. On this screen you can configure the title and description:
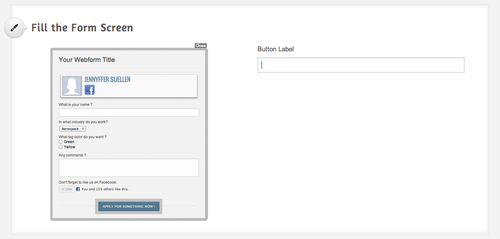
On the following screen you can configure the submit button name:
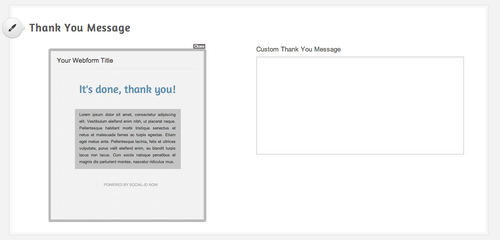
On the following screen you can configure a thank you message to be shown after filling out the form:
Widget Testing
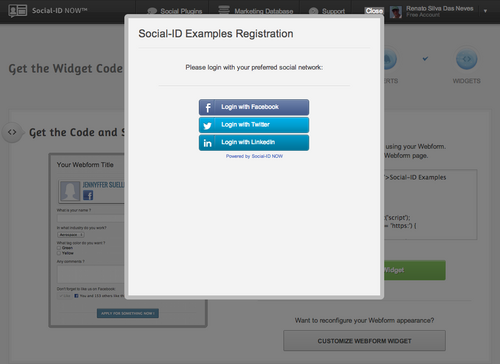
On the screen above we show a link to open the Social Webform widget. When you click it, a dialog will open with the login options for the webform:
You can log in, see how the form shows up and finish the registration to confirm redirects and alerts. It is important to remember that this registration will be considered a valid registration, so it will be available on the dashboard.
Widget Installation
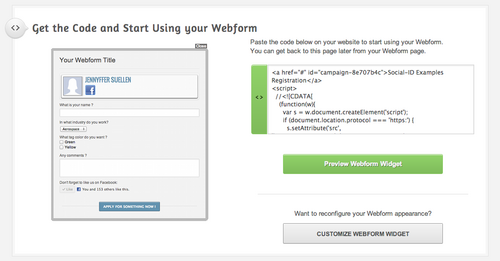
Widget installation is very simple: you just have to paste a Javascript / HTML snippet on your website and you will be ready to go. You can copy the widget code on the following screen:
See more details about the available parameters on the Social Webform Javascript API.
