Zyxel NXC Series
The following guide was created using a Zyxel wireless network with the following components:
- Controller: Zyxel NXC2500
- AP: Zyxel NWA5123-NI
- Firmware: V5.00(AAIG.3) / V1.03 / 2017-02-03 07:02:31
Contents |
Configuring the RADIUS Server
Configure the CoffeeBean RADIUS server by creating a new AAA Server.
Go to "Configuration > Object > AAA Server" and click in the RADIUS tab.
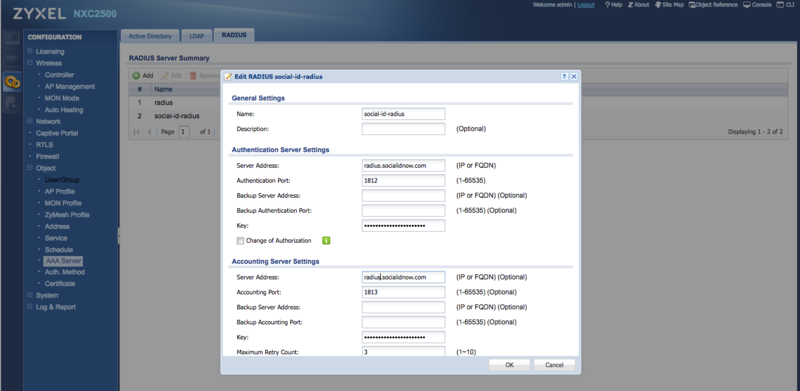
Click to add a new RADIUS server, set a name such as "social-id-radius" and configure the authentication and accounting settings as follow.
RADIUS Authentication
- Server Address: the primary RADIUS server hostname according to your environment/region
- Authentication Port: 1812
- Backup Server Address: the secondary RADIUS server hostname according to your environment/region
- Backup Authentication Port: 1812
- Key: the provided RADIUS client secret
RADIUS Accounting
- Server Address: the primary RADIUS server hostname according to your environment/region
- Accounting Port: 1813
- Backup Server Address: the secondary RADIUS server hostname according to your environment/region
- Backup Accounting Port: 1813
- Key: the provided RADIUS client secret
You can also enable "Accounting Interim Update" to send accounting information in the desired interval.
Important: the RADIUS key (shared secret) must be up to 15 alphanumeric characters.
Authentication Method
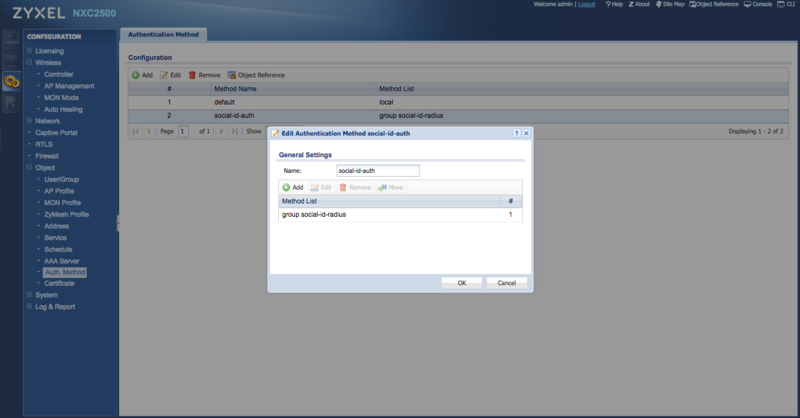
Go to "Configuration > Object > Auth. Method" and click in Add to create a new authentication method.
Set a name such as "social-id-auth" and add the RADIUS server created earlier (e.g.: "group social-id-radius"):
SSID
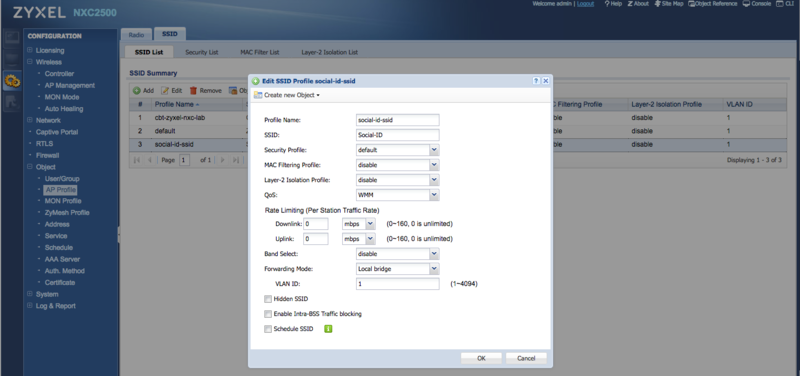
Go to "Configuration > AP Profile" and click in the SSID tab.
Create a new SSID with a Profile Name "social-id-ssid", for example, and set your SSID name:
Captive Portal
Configure the external CoffeeBean captive portal.
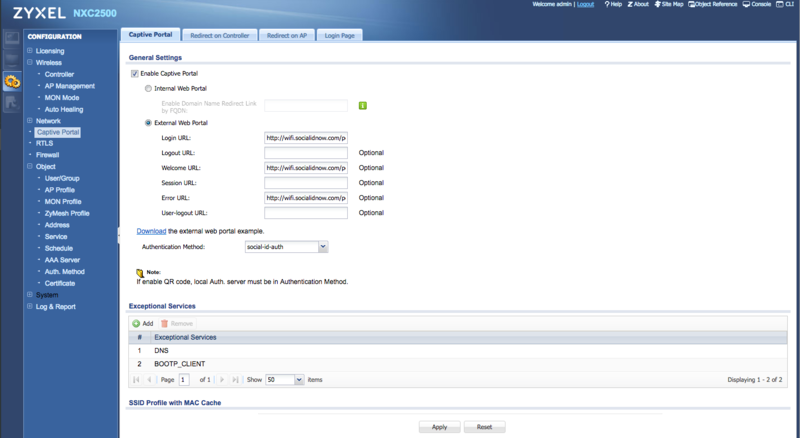
Go to "Configuration > Captive Portal", click to "Enable Captive Portal" and choose "External Web Portal":
Then fill the following info:
- Login URL: the provided captive portal login URL
- Welcome URL: the provided captive portal welcome URL
- Error URL: the provided captive portal error URL
- Authentication Method: the Authentication Method created earlier (e.g.: "social-id-auth")
Authentication Policies and Walled Garden
You need to configure the authentication policies, including the hosts you need to leave open before the user authenticates to the network (walled garden). These unauthenticated hosts must include CoffeeBean Platform and social networks IP ranges provided as authentication methods.
Follow this sequence to complete the configuration:
- Create one Address for each host in the walled garden.
- For each Address, you need to create a Policy Rule and set the Destination Address.
- Create a Policy Group including all the policy rules.
Let's see in details each step:
Configuring Addresses
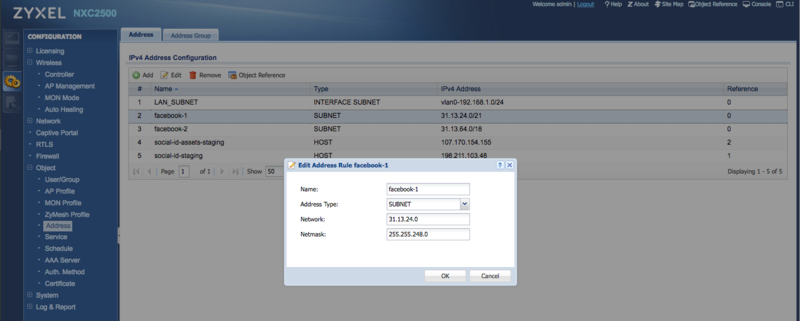
Go to "Configuration > Object > Address", Address tab.
Add a new Address object for each host in the walled garden. Get the list of IP ranges for CoffeeBean Platform and each social network you use in your captive portal.
Example: for the Facebook CIDR 31.13.24.0/21 you need to add the following object:
- Name: facebook-1
- Address Type: SUBNET
- Network: 31.13.24.0
- Netmask: 255.255.248.0
You can use tools like http://www.ipaddressguide.com/cidr to get the starting and ending addresses from CIDR notations.
Configuring Policy Rules
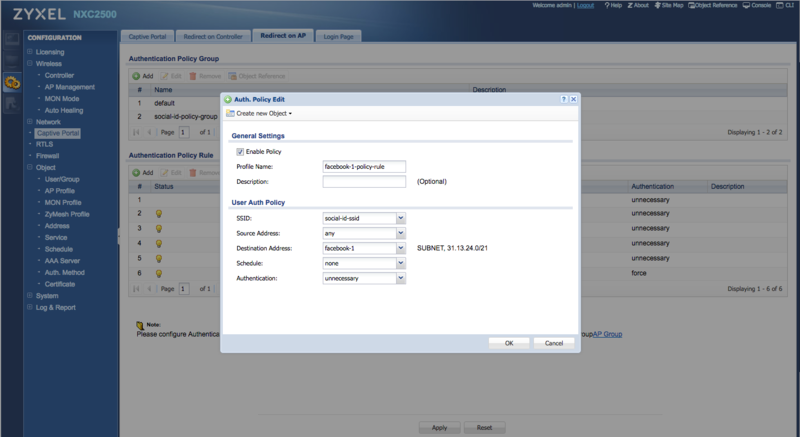
Go to "Configuration > Captive Portal" and click in the "Redirect on AP" tab.
Add a new Authentication Policy Rule for each Address created earlier.
Example: for the Address "facebook-1" you need to add the following policy rule:
- Profile Name: facebook-1-policy-rule
- SSID: the SSID created earlier (e.g.: social-id-ssid)
- Source Address: any
- Destination Address: facebook-1
- Schedule: none
- Authentication: unnecessary
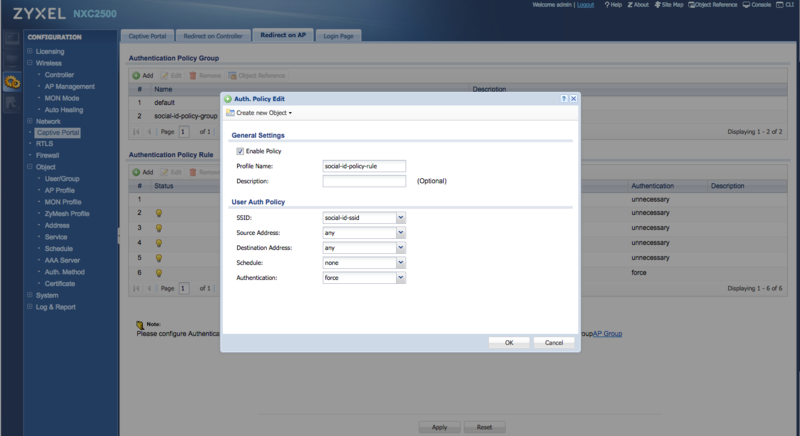
After creating one policy rule for each walled garden Address, you need to create one more policy rule to force authentication to all other destinations:
- Profile Name: social-id-policy-rule
- SSID: the SSID created earlier (e.g.: social-id-ssid)
- Source Address: any
- Destination Address: any
- Schedule: none
- Authentication: force
Configuring the Policy Group
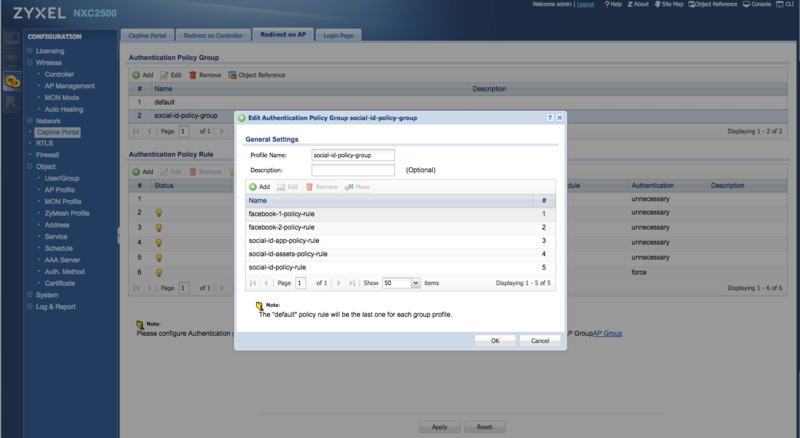
The policy group is used to define the order in which the policy rules will be applied.
Go to "Configuration > Captive Portal" and click in the "Redirect on AP" tab.
Add a new Authentication Policy Group with a name such as "social-id-policy-group" and add each policy rule you have created earlier.
Don't forget to add the policy rule "social-id-policy-rule" as the last one in the list.
AP Management
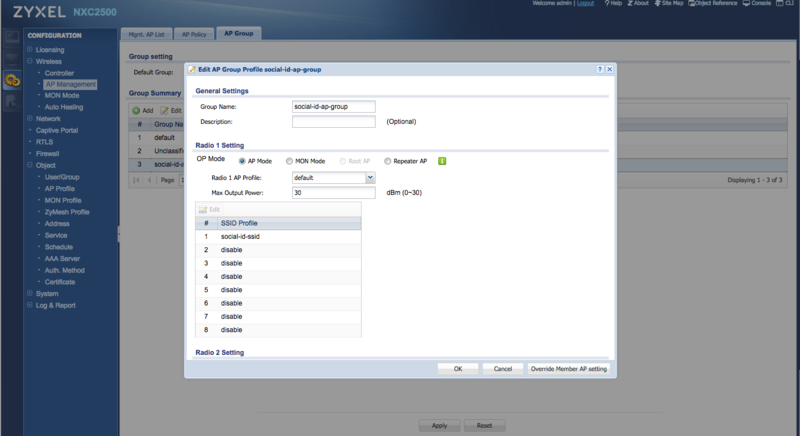
Go to "Configuration > AP Management" and click in the "AP Group" tab.
Create a new AP Group with a Group Name "social-id-ap-group", for example.
For the Radio 1 and Radio 2 Settings, select the SSID created earlier (e.g.: social-id-ssid) as a "SSID Profile":
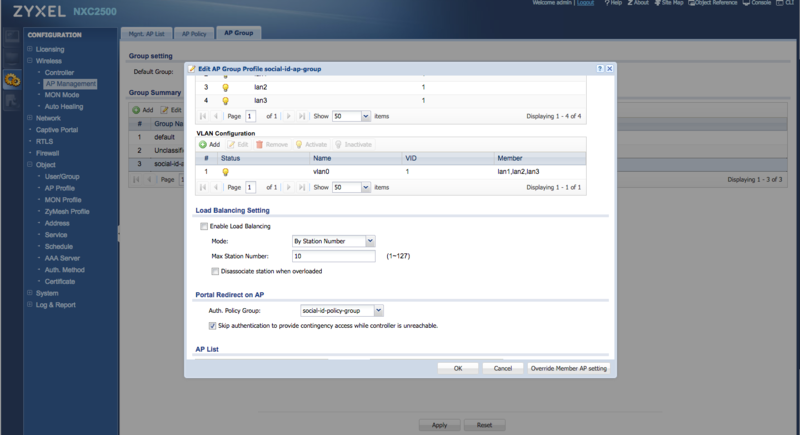
In the "Portal Redirect on AP" setting, select the Policy Group created earlier (e.g.: social-id-policy-group):
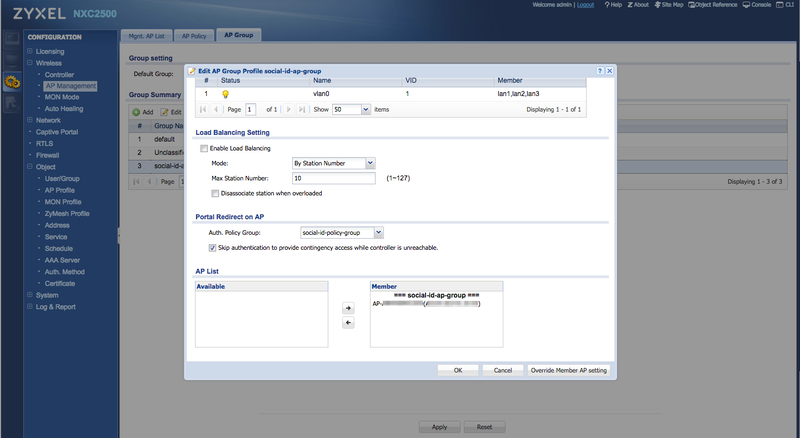
In the "AP List" configuration, move the APs you want to use to broadcast the SSID with CoffeeBean Captive Portal to the "Member" list:
