Mikrotik RouterOS
The following guide was created using a Mikrotik network with the following components:
- Router: Mikrotik RouterBoard 450G
- Firmware: 3.22
- WebFig: v6.23
Contents |
Requirements
You need to have a Mikrotik RouterBoard with Internet access already configured.
You can reset your RouterBoard and connect the cable with Internet access at the ethernet gateway port (ether1-gateway).
By default, the RouterBoard is configured with automatic address acquisition, so it will get the IP and Gateway from your Internet cable connection and will set up a DHCP Client also.
Interfaces
By default, the RouterBoard 450G comes with 5 ports and the following interfaces:
- ether1-gateway
- ether2-master-local
- ether3-slave-local
- ether4-slave-local
- ether5-slave-local
In this guide, we'll create a new interface (bridge-hotspot) and associate one of the slaves interface to the bridge.
Ethernet
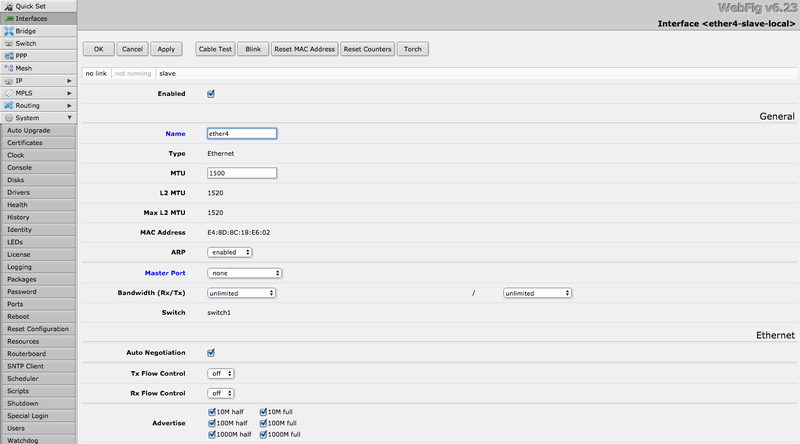
Go to Interfaces and edit one of the interfaces (e.g. ether4-slave-local). Change the following options:
- Name: ether4
- Master Port: none
Bridge
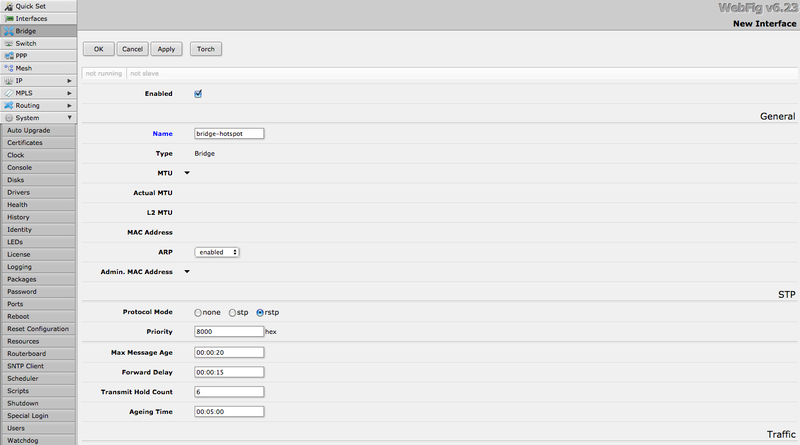
Go to Bridge and click in "Add New". Set the following options:
- Name: bridge-hotspot
Now you need to associate the Ethernet interface to the bridge.
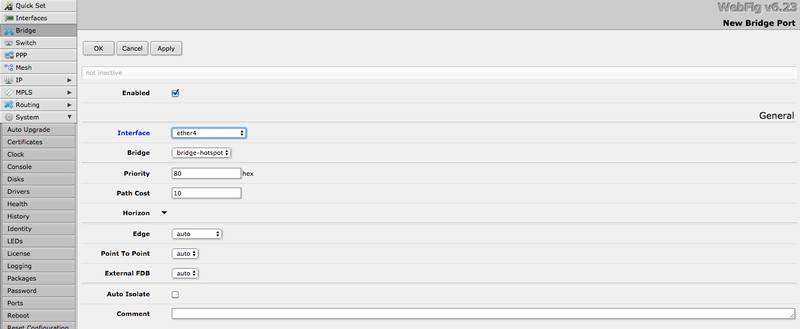
Go to Bridge > Ports tab and click in "Add New". Set the following options:
- Interface: ether4
- Bridge: bridge-hotspot
Radius
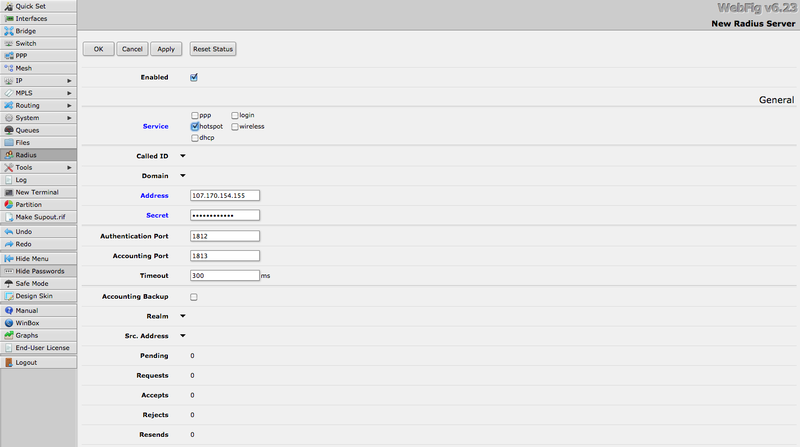
Go to Radius and click in "Add New". Set the following options:
- Enabled: checked
- Service: Hotspot
- Address: the RADIUS server IP according to your environment/region
- Secret: the provided RADIUS client secret
- Authentication Port: 1812
- Accounting Port: 1813


